Customize your BACE function outputs
Two key functions can be defined in /app/bace/user_convert.py to further customize your BACE application outputs.
Add components to a user profile
When the initial call to the create_profile route is activated, all inputs associated with the call will be assigned to the respondent's profile as a dictionary with profile_id, a uniquely created ID, as the key.
Examples of these inputs could be the respondent's demographic characteristics.
The route then returns the unique profile_id and the first optimal design.
When you modify /app/bace/add_to_profile(profile), you can add other data to each respondent's profile.
These are additional characteristics added to a respondent's profile that will be held fixed throughout an experiment.
For example, you can add a timestamp of when the respondent initiates the create_profile call.
Another handy use is to randomize respondents into treatments.
For example, a treatment group can be created based on each respondent's profile.
These additional characteristics can then be accessed in the convert_design function described below.
For example, suppose you want to randomize individuals into a treatment and control group.
import random

def add_to_profile(profile):
    treatment_group = ['Control', 'Treated']
    profile['treatment_group'] = random.choice(treatment_group)
    return profile
Convert Design Output
You can define the convert_design() function, which can be used to edit raw designs (specified as a specific design_params) to be more user-friendly. For example, you can format designs into HTML tables or graphs.
The function takes as input:
design(dict) - the optimal design. This is a dictionary with each key fromdesign_params.profile(dict) - respondent's profile. This is a dictionary containing all information from the respondent's DynamoDBprofile. This includes information from the body of the HTTP request from the initial<your-URL>/create_profileAPI request. It also includes information added throughadd_to_profile().request_data(dict) - information from the body of the HTTP request from the most recent<your-URL>/update_profileAPI request.
# Convert design
def convert_design(design, profile, request_data):

    # Add code to edit design. Return dict that will be sent to user.

    return output_design
For example, suppose you want to present the design output (the question to ask the respondent) differently based on the respondent's treatment group (as set by the add_to_profile() function):
# Convert design
def convert_design(design, profile, request_data):

    # Add code to edit design. Return dict that will be sent to user.
    if profile['treatment_group'] == 'Treated':
        # Add code to modify the design for the treatment group
        output_design = design  # replace with actual modification code
        return output_design
    else:
        # Add code to modify the design for the control group
        output_design = design  # replace with actual modification code
        return output_design
An example
Your BACE package template comes with an example /app/bace/user_convert.py. The code is reproduced below with the associated output. This formatted output can be used directly in integration with survey platforms such as with Qualtrics integration.
def choice_message(label, price, color, pen_type):

    price = '${:,.2f}'.format(price)

    # Create the HTML table
    html_table = f"""
        <table width='300px' border='1' cellpadding='1' cellspacing='1' style='font-family: Arial, Tahoma, "Helvetica Neue", Helvetica, sans-serif; border-collapse:collapse; background-color:#eee9e7; color:black;'>
            <tbody>
                <tr>
                    <th style="text-align: center; background-color: #ded4ce;"><b>{label}</b></th>
                </tr>
                <tr>
                    <td style="text-align: center;"><em>Price:</em><br> {price}</td>
                </tr>
                <tr>
                    <td style="text-align: center;"><em>Pen Color:</em><br> {color}</td>
                </tr>
                <tr>
                    <td style="text-align: center;"><em>Pen Type:</em><br> {pen_type}</td>
                </tr>
            </tbody>
        </table>
    """
    return html_table

def convert_design(design, profile, request_data):

    # Number of questions
    Q = request_data.get('question_number') or len(profile.get('design_history'))

    output_design = {f'{key}_{Q}': value for key, value in design.items()}

    output_design[f'message_0_{Q}'] = choice_message("Pen A", design['price_a'], design['color_a'], design['type_a'])
    output_design[f'message_1_{Q}'] = choice_message("Pen B", design['price_b'], design['color_b'], design['type_b'])

    return output_design
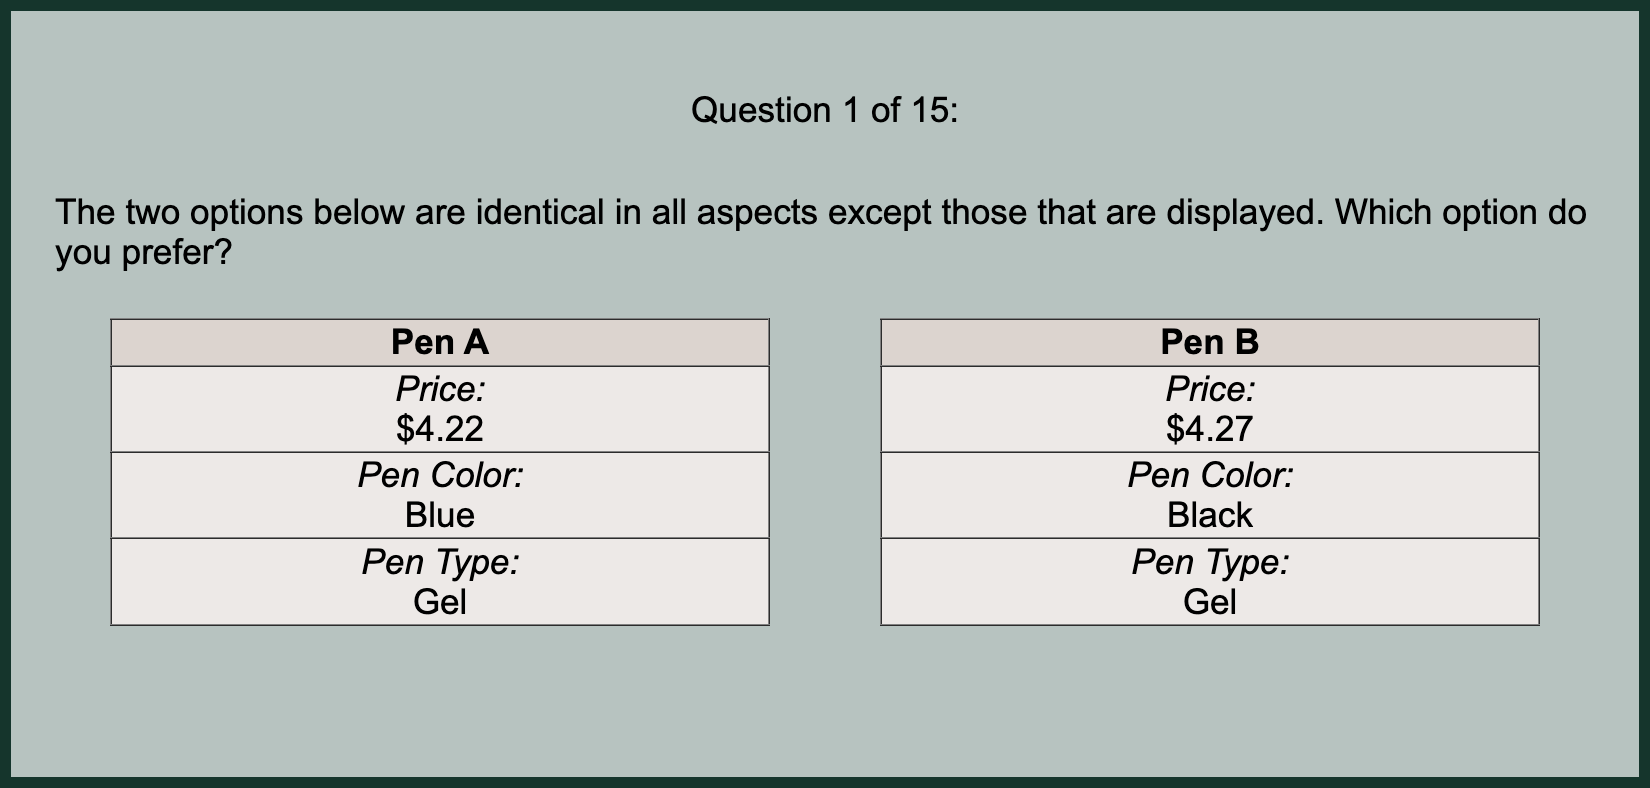
Given the design below:
design = dict(
    price_a = 4.22,
    price_b = 4.27,
    color_a = 'blue',
    color_b = 'black',
    type_a  = 'gel',
    type_b  = 'gel'
)
The code will assign text values (HTML code) to two different options that a respondent can choose from. When these are displayed in a survey website, the result is as follows:
Summary
These two functions handle many of the changes that you will want to add when running your experiment. For example, add_to_profile() can be used to specify profile-specific information that is consistently used across an experiment for an individual respondent. This information will be stored alongside the respondent's profile and can be accessed elsewhere in the application by the respondent's profile_id.
convert_design() is a very useful function for converting a raw design (JSON object) into user-friendly text. For example, you could use this function to format designs as HTML tables, incorporate images, or create figures that reflect the optimal design. (These features can be achieved using survey-side code as well, but converting designs within your application allows for extensive flexibility and can expand what a "design" is.)